Label Studio Docker
Label Studio is a multi-type data labeling and annotation tool with standardized output format
Playground
Documentation
Docker
docker run -it --name label-studio -p 8080:8080 -v `pwd`/mydata:/label-studio/data heartexlabs/label-studio
You can find all the generated assets, including SQLite3 database storage label_studio.sqlite3 and uploaded files, in the ./mydata directory.
Docker Compose
Label Studio
Nginx - proxy web server used to load various static data, including uploaded audio, images, etc.
PostgreSQL - production-ready database that replaces less performant SQLite3.
To start using the app from http://localhost run this command:
docker-compose up
Install locally with pip
# Requires Python >=3.7 <=3.9
pip install label-studio
# Start the server at http://localhost:8080
label-studio
Install locally with Anaconda
conda create --name label-studio
conda activate label-studio
pip install label-studio
Import Data
Cloud storage setup
Amazon S3
Open Label Studio in your web browser.
For a specific project, open Settings > Cloud Storage.
Click Add Source Storage.
In the dialog box that appears, select Amazon S3 as the storage type.
In the Storage Title field, type a name for the storage to appear in the Label Studio UI.
Specify the name of the S3 bucket, and if relevant, the bucket prefix to specify an internal folder or container.
Adjust the remaining parameters:
Bucket Name, S3 Endpoint, Access Key ID, Secret Access Key
Click Add Storage.
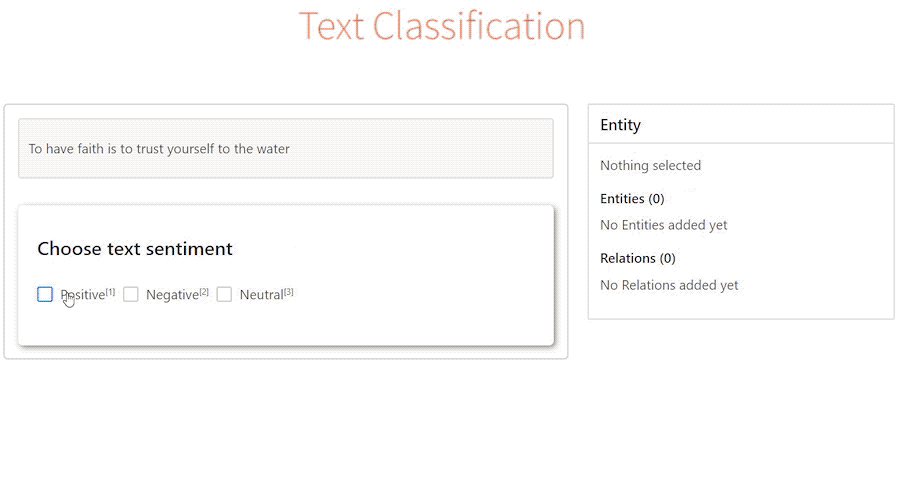
Screenshots
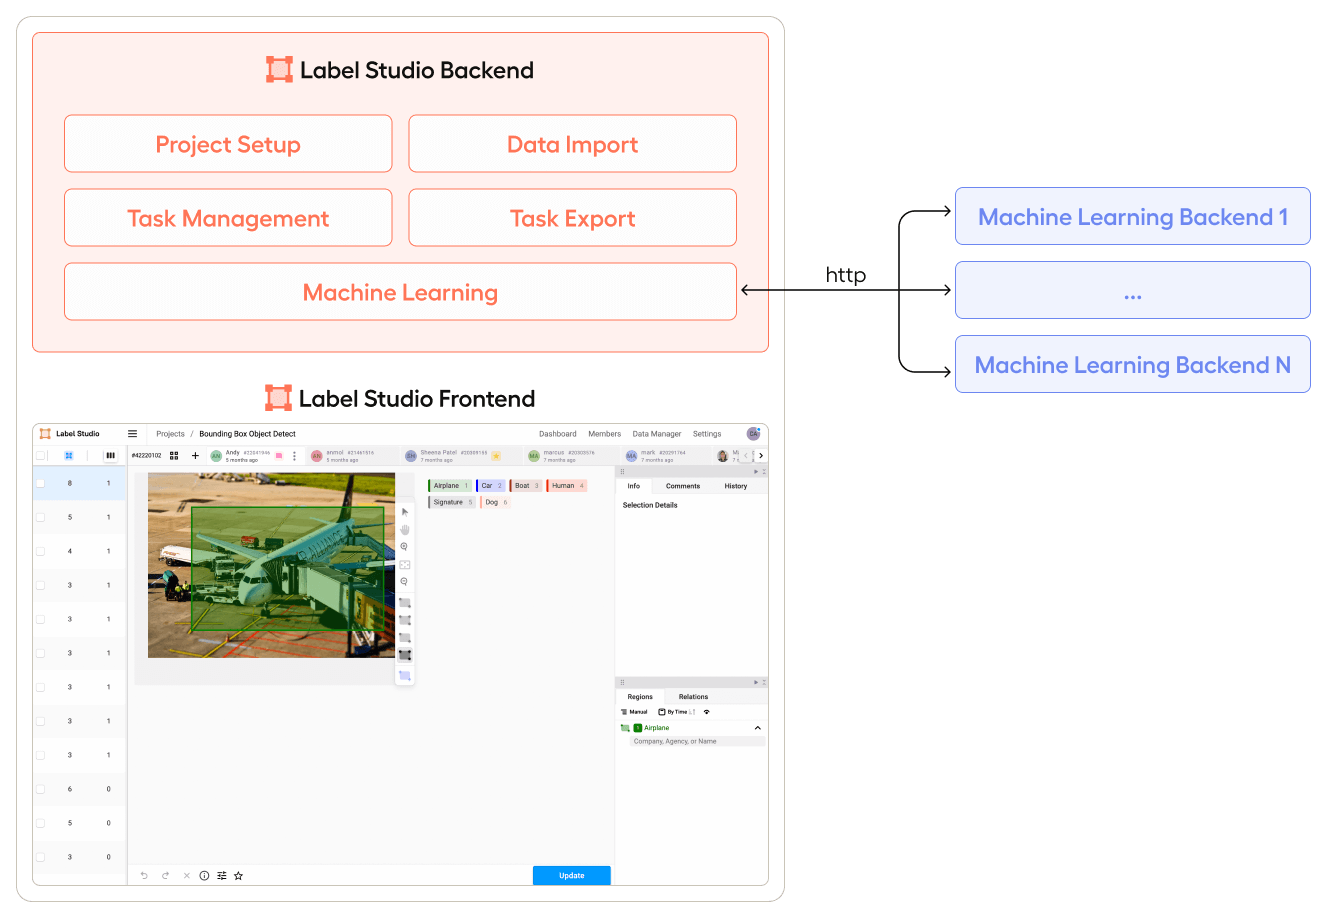

Label Studio ML backend
Configs and boilerplates for Label Studio’s Machine Learning backend
How it works
Get your model code
Wrap it with the Label Studio SDK
Create a running server script
Launch the script
Connect Label Studio to ML backend on the UI
Quickstart with an example ML backend
git clone https://github.com/heartexlabs/label-studio-ml-backend
cd label-studio-ml-backend/label_studio_ml/examples/simple_text_classifier
docker-compose up
Start your custom ML backend with Label Studio
Setup environment
cd label-studio-ml-backend
# Install label-studio-ml and its dependencies
pip install -U -e .
# Install the dependencies for the example or your custom ML backend
pip install -r label_studio_ml/examples/requirements.txt
Initialize an ML backend based on an example script:
label-studio-ml init my_ml_backend --script label_studio_ml/examples/simple_text_classifier/simple_text_classifier.py
Start ML backend server
label-studio-ml start my_ml_backend
Start Label Studio and connect it to the running ML backend on the project settings page.